
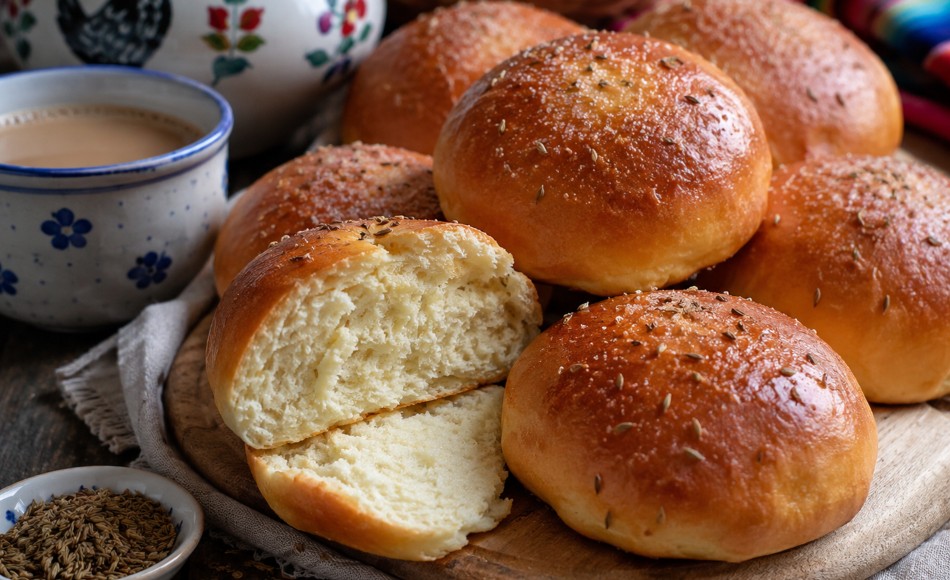
Peruvian anise bread is a traditional bakery preparation known for its soft crumb, gentle sweetness, and distinctive aroma from anise seeds. It is made in different regions of Peru and is commonly found in neighborhood bakeries, local markets, and family kitchens.
This lightly sweet bread is especially popular for breakfast or an afternoon snack. It is traditionally served with coffee, milk, hot chocolate, or herbal tea and may be shaped into individual rolls, braids, or larger loaves.
The most representative version uses wheat flour, yeast, milk, sugar, butter, eggs, and whole anise seeds. Two rising periods give the bread its light texture and softly browned crust.
Print
Peruvian Anise Bread
- Prep Time: 30 minutes
- Cook Time: 22 minutes
- Total Time: 2 hours 35 minutes
- Yield: 12
- Category: Dessert
- Cuisine: Peruvian
Ingredients
- 500g all-purpose flour (4 cups)
- 10g instant dried yeast (1 tbsp)
- 120g white sugar (1/2 cup plus 2 tbsp)
- 8g salt (1 1/2 tsp)
- 12g anise seeds (1 tbsp)
- 250ml lukewarm milk (1 cup)
- 2 large eggs
- 80g unsalted butter, at room temperature (1/3 cup)
- 5ml vanilla extract (1 tsp)
- 1 egg, beaten with 15ml milk (1 tbsp), for brushing
- 10g anise seeds (2 tsp), for decoration
- 20g white sugar (1 1/2 tbsp), for decoration
Preparation
- Activate the yeast, by mixing the lukewarm milk with one tablespoon of the sugar and the yeast. Let it rest for 8 to 10 minutes, until a light layer of foam appears on the surface. The milk should be lukewarm, not hot, to avoid damaging the yeast.
- To make the dough, place the flour, remaining sugar, salt, and anise seeds in a large bowl. Make a well in the center and add the yeast mixture, eggs, and vanilla. Mix the ingredients until you have a moist, slightly sticky dough.
- Incorporate the butter, adding it little by little while kneading. Knead the dough for 10 to 12 minutes on a clean surface, until it is smooth, elastic, and can be stretched without tearing easily. Avoid adding too much flour, as this could make the bread dry.
- Let the dough rise, shape it into a ball, place it in a lightly greased bowl, and cover it with a clean cloth. Let it rise in a warm place for 60 to 90 minutes, or until it has doubled in size.
- Shape the loaves, gently press the dough to release any excess gas and divide it into 12 equal portions. Shape them into round or slightly oblong rolls and place them on a baking sheet lined with parchment paper, leaving space between them.
- Perform the second rise, cover the loaves loosely, and let them rest for 35 to 45 minutes, until they appear puffed up and light. Meanwhile, preheat the oven to 180°C (350°F).
- To decorate and bake, carefully brush the loaves with the egg and milk mixture. Sprinkle the anise seeds and sugar over the top. Bake for 18 to 22 minutes, until golden brown and sound slightly hollow when tapped on the bottom.
- To cool and serve, remove the loaves from the oven and let them rest for 10 minutes on the baking sheet. Then transfer them to a wire rack and wait until they are lukewarm before serving, to allow the crumb to settle.
Chef’s Tips
- Use fresh anise seeds because they lose aroma during long storage.
- Rub the seeds lightly between your fingers before adding them to release more fragrance.
- Do not overheat the milk because excessive heat can prevent the yeast from working.
- Knead until the dough becomes elastic before adding any extra flour.
- Follow the dough’s volume as well as the stated rising times, since room temperature affects fermentation.
- Do not cut the bread immediately after baking because the crumb is still moist and may become compressed.
Traditional Variations
Some households make anise bread with water instead of milk, producing a firmer crust and less tender crumb. Others add a small amount of evaporated milk for extra richness.
Raisins or a light sprinkling of sesame seeds may also be included. However, the most recognizable version keeps anise as the principal flavor.
The shape varies between bakeries and regions. The dough may be formed into individual rolls, small rings, braids, or one large loaf for sharing.
Traditional Serving Style
Serve anise bread warm or at room temperature. Split it open and accompany it with butter, fresh cheese, or a small amount of fruit preserves.
It is commonly enjoyed for breakfast, an afternoon snack, or in a packed lunch. Its aroma pairs especially well with warm beverages and simple toppings that do not overwhelm the anise flavor.
Recommended Pairings
- Peruvian-style brewed coffee
- Hot chocolate
- Milk
- Anise or cinnamon tea
- Fresh cheese
- Butter
- Homemade fruit preserves
Did You Know?
Anise has been used for generations in Peruvian baking and confectionery. In addition to bread, it appears in traditional rings, cookies, sweet biscuits, regional desserts, and herbal infusions.
Its aroma becomes stronger during baking, especially when the seeds are used both inside the dough and on the surface. For this reason, anise bread is often recognizable before it even leaves the oven.
Frequently Asked Questions
Yes, but the flavor will be more concentrated and the texture will change. Use approximately 4 g of ground anise instead of whole seeds. Traditional anise bread generally uses whole seeds because they distribute their aroma gradually and add tiny points of texture.
This may result from too much flour, insufficient kneading, or overbaking. The dough should remain soft and slightly moist. Proper rising is also essential because the yeast needs enough time to create a light crumb before the bread enters the oven.
Stretch a small piece gently between your fingers. When it forms a thin membrane without tearing immediately, the gluten has developed sufficiently. Continue kneading for several more minutes if it breaks apart easily.
Yes. After kneading, place the dough in a covered container and refrigerate it overnight. The next day, let it stand at room temperature for 30 minutes, shape the rolls, and continue with the second rise.
Store it in an airtight bag or container at room temperature for 2 to 3 days. Warm it briefly in a low oven to restore softness. You can also freeze it tightly wrapped for up to one month.